Showing posts with label DIY. Show all posts

Tuesday, December 12, 2006

The favors

The story of our favors began last November/December. Based on an idea from Martha, I was toying with the idea of giving rosemary-infused salt since we both like to cook/eat and it's a practical gift that guests would be able to use over and over. Plus the herb rosemary has some love symbolism attached to it and I thought making all that and assembling it would be relatively simple. I just had to come up cute, food-safe containers that weren't too big, but would be relatively airtight, and a way to decorate it all. While save-on-crafts had a good deal on jars, I found out they weren't made for holding food. So instead I was pretty settled on buying glass jars or metal tins from SKS (great resource, btw!). But then I got this email from IKEA about a huge sale they were having (I think it may have been an end of Christmas sale) for champagne glasses. Since it was a limited time sale, we quickly made the decision to buy 400 of these (we hadn't even hammered out the guest list yet), without any idea of what we'd do with them. At first we thought it'd come in handy for a champagne toast since we know there aren't any flutes in Chinese restaurants (and flutes hold a lot less liquid than the regular wine glasses or water goblets that they usually have, which would save on the bottles we'd have to purchase). But then there were the 49 interjections that everyone had to have, complaining about guests not wanting to bring home a wet/dirty glass that they just drank out of, that guests wouldn't know that the glass was the favor, that some ppl wouldn't drink the champagne and then what would they do with a filled glass?, blah blah blah, ad infinitum, ad nauseum. All I knew was that I wanted to personalize the glasses in some way so that ppl would remember years down the line why they have this dusty thing in their cupboard and that they may be able to use on occasion.

After months of thinking and others' return from trips to HK, we started to engrave these 400 glasses with a double happiness symbol. We tried stamping various things on various parts of the glass (difficult to get a good image on the rounded, slick surface) in red permanent ink but we had to give that up b/c it would always smudge. So I had to settle for just the double happiness, no date, no initials/name -- we'd have to incorporate those elements some other way. I didn't think of that way until just a month before the big day (more on that later). In the meantime, we bought contact paper and engraving cream (you wouldn't believe how difficult it is to locate this -- we were later told that they don't carry this in NYC stores and had to go out to LI to get an extra bottle from the AC Moore there) and proceeded to do all the zillion steps required to engrave, inviting 2 BMs and other friends over numerous times to get this Sisyphean feat accomplished.

First, we cut the contact paper into squares or rectangles that were big enough to fit the double happiness character on it. Then we used the double happiness craft punch imported from HK (through BM's sister) and punched out the shape into the contact paper. With the intricate & somewhat delicate parts of the character being punched into the 2-layer paper, we (or more like I) had some difficulty getting the piece out without ripping it or destroying it in some way. When Dear took this over, it was a lot easier since he was able to fully punch through all the layers without a problem using his Popeye-like muscles. He was even able to punch several squares at once, finishing up in no time (more or less). However, after punching out 400+ of these suckers, the punch completely fell apart -- so sad since I'd like to be able to use it for cards or something.

Then we had to adhere these self-made stickers onto the glass, where the cut-out areas would be engraved for that frosted glass look. When we first stuck on a few of them and tried engraving the glasses, I was really dissatisfied at how it came out -- there were jagged edges everywhere and the engraving wasn't done evenly so there were splotchy patches throughout. Then someone suggested we clean up the image a little by cutting off the 'sticks' that attach the double happiness to the outer circle at the top, bottom, and sides. Admittedly, it did make the final image a lot better, but that significantly increased our workload. One summer day, 5 of us worked until 1am or so and we still didn't finish adhering all the stickers and cutting off the extra pieces!

But one weekend, we finally finished that step and started to engrave. After a while, I realized brushing the cream onto the glass didn't give the best results. What did work was pouring a glob of the cream onto the part we wanted engraved (making sure it didn't go beyond the contact paper) and then scraping it off after a few seconds with those fake plastic credit cards you get in the mail. Since you could reuse the cream a few times, we got into a sort of rhythm of scraping off one glass and spreading it onto the next glass while the other person would dunk the finished glasses in soapy water, wipe off all remnants of the cream, rip off the sticker, and rinse everything clean. As you can imagine, this part took a very long time and many busy weekends. Lots of ppl wanted to help but it was difficult to coordinate, especially when the glasses were being stored at Dear's place.

But eventually we finished engraving. The glass on the left is the final product and the one on the right is one of our first prototypes, with the sticks still attached.

For part 2 of the favors, we decided to put some candy into the glasses, more specifically, red Jelly Bellys. One Saturday, we trekked to Economy Candy, which seemed to be comparably priced to the other online sites, if not cheaper b/c we wouldn't have to pay for shipping (though there is tax, I think) and there was a slight discount (I forgot how much) for bulk orders. Plus, being an Economy Candy virgin, I'd always wanted to visit the famed store and I was thrilled to finally see all that candy (some I haven't seen since I was kid) packed into one place. At the store, we learned how expensive getting all those gourmet jelly beans would be and we added ivory Jordan almonds to the mix. I forget how many pounds we did get, maybe something like 5 or 10 lbs each of the strawberry jam and the raspberry (both so yummy!!) and perhaps 10 lbs of the almonds. Then we assembled the little tulle packages (MIL cut the rectangles of tulle from my 1000' spool, and boy was she fussy!). One person would scoop some beans and almonds and then the other would tie it all up with the orange 3/16" wide single-faced satin ribbon that I got from Artistic Ribbon. We tied the other end of the ribbon to the personalized tags we made (see part 3). Oh, we also mixed up the 2 types of beans in one bowl so that each package would have both types -- I wonder if anyone noticed that there were 2 flavors? Working with the beans was so intoxicating (you can stand 2 feet away and still smell them through the plastic) I got a bit sick of smelling them for 12 hours straight. I really liked how deep red the beans were though, but it was a bit hard to see when we finally put it in the glass, I think.

And for part 3, I reverted back to my idea of using shrink film (aka Shrinky Dinks, if you want the brand name) in some way. Instead of my original idea of making wine charms to put onto the stems of the glasses, I thought we could make thick, plastic, personalized tags out of the shrink film. So I purchased 106 sheets of white printable shrink film from Dick Blick's, came up with a simple design with our names, wedding date, and a double happiness symbol on it, printed it out (4 to a sheet) on an inkjet printer, cut the 4 pieces apart (used the guillotine cutter at work to cut several sheets at once since things didn't need to be so exact, so that moved pretty quickly), punched a hole in the top of each, and then baked them according to the instructions on the package. Since it shrinks to about 1/3 of the original size, using a regular 3/8" hole punch gave it just the right sized hole for the thin ribbon. For best results, when I took the shrunken stuff out of the oven, I flattened it with a book or something flat. Sometimes the tags didn't quite come out the way I wanted (curling under itself or not shrinking completely, or not being completely flattened), but what makes shrink film so cool is that you can always put it back in the oven until it softens again and shape it the way you like. You just have to be careful you don't burn it (yes, this can actually happen) and I think after a while, it gets harder and harder to reshape it. Some of the tags we made came out more toasted than others, which was kinda nice too b/c it looked ivoryish, to match our invitations. :) The colors also deepened so that the red of the double happiness came out burgundyish, just like our color scheme! Major props to BM who took a whole bunch of these home and shrunk them in one afternoon with her mother.

With the shrink film, you can make anything you want, in any shape, with any design. I think that makes it a great alternative to the personalized paper tags and/or stickers/labels that you can buy from places like Bliss Weddings Market, Wedding Things and My Own Labels. And because it's plastic, it lasts much longer than just cardstock. If only I thought of it sooner so that I could have designed something nicer. Though sometimes simple is best, no?

Friday, December 1, 2006

Banquet details

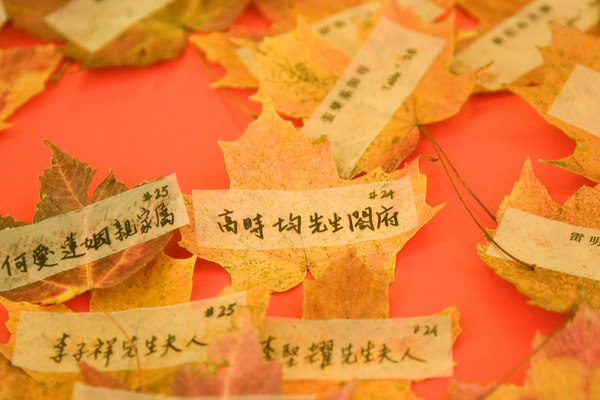
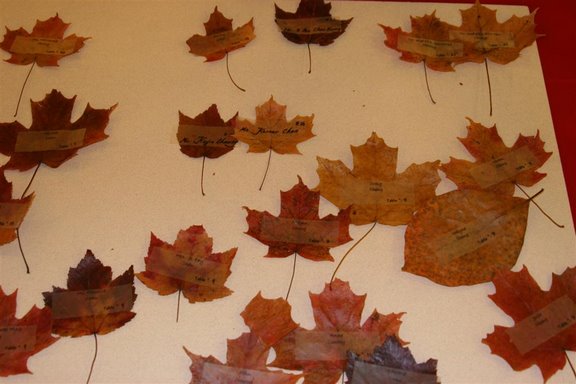
The detail that everyone seemed to love was the escort cards that we made out of leaves. Other than the gathering, pressing, shellacking, and storing of the leaves, I have very little knowledge of how the leaves became escort cards. At one point Dear bought a bunch of clear labels (since he refused to handwrite each one) and printed out names and table numbers on them. He also gave a bunch to my mother who could not provide us with a clear guest list so she had to handwrite hers. Lots of people commented on how creative we were, though one party pooper had to add that they were brittle (eh, screw him!). Some people seemed to like the idea so much that they pinned a leaf to themselves, as if it were a boutonniere. If I had fresh autumn leaves, I would have petitioned for adding one to Dear's boutonniere.


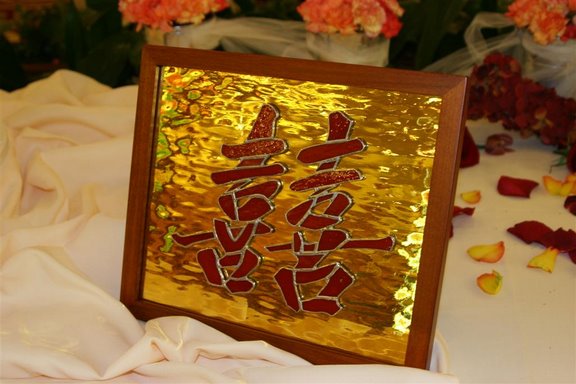
My MIL is a stained glass nut -- she goes every week to her class and her house is filled with all sorts of stained glass pieces. So it was only natural that I ask her to make us something featuring a double happiness character. At first I thought it'd be nice to have her make a caketopper but then she shot that idea down saying it'd be too heavy (I think a cake should be able to hold it up without collapsing) and saying that she was concerned about lead poisoning since the soldering is done with lead (though I said we could easly put a piece of cardboard underneath it to prevent that). So I said we'd just place the double happiness somewhere on the cake table then, akin to the large "I Do" letters that many brides use. After asking me a million questions and asking me to print her several sizes on paper, she set to work and bought the glass. Her choice of glass was not ideal, it turns out, since it was really a mirror (or something she explained that I don't understand) and she was not able to cut it into a circle. Instead, she'd have to keep it as a rectangle and she wouldn't be able to solder the edges so she also bought a frame to put it in. I wasn't crazy about the gold, but that's what happens when you give someone free reign. I think it turned out OK.
Behind the scenes, after-the-fact, "Pop-Up Video"-esque tidbit: I later learned MIL told the photographer that she made it and she urged him to take pictures of it.

In the last days, I just couldn't do anymore and Dear stepped up to do the table/menu cards, from design to printing. Of course, what I wanted was a lot more complicated so the simple idea Dear came up with was a lifesaver (not that I helped with that). On one side he included the guest names and on the other, the menu, along with explanations for each course.
I don't have the final wording of the menu, but it was something like this (this is our first draft):
There are 9 main courses to a Chinese banquet menu as the number connotes "everlasting." Everything is served whole to symbolize completeness. There is a delicate balance not just in the flavors, but also in the cooking method, where boiling balances frying, braising/steaming, cold/hot, savory/sweet.

Cold appetizer platter: Roast pig, ham, beef, jellyfish and pickled vegetables
Pig symbolizes purity -- J__ delivered a whole roast pig to R___'s parents to make the engagement official in the Chinese tradition.

Jumbo battered shrimp with candied walnuts

Shark fin soup with chicken
A very expensive delicacy, shark fin symbolizes prosperity.

Braised abalone with mushrooms and Chinese vegetables

Sirloin Steak with broccoli

Crispy whole fried chicken
The chicken symbolizes the phoenix (mythological bird), the representation of the wife.

Lobster, stir-fried with ginger and scallions
The lobster symbolizes the dragon, which represents the husband.

Steamed whole fish
Fish is a must at every important meal, as it sounds like the word "abundance" in Chinese.

Fried rice and E-fu noodles with mushrooms
Noodles, especially the e-fu noodles, are served to symbolize longevity.

Red bean soup with lotus seeds
Red is a lucky color and lotus seeds symbolize fertility.

Wednesday, November 8, 2006

Ceremony detail: music

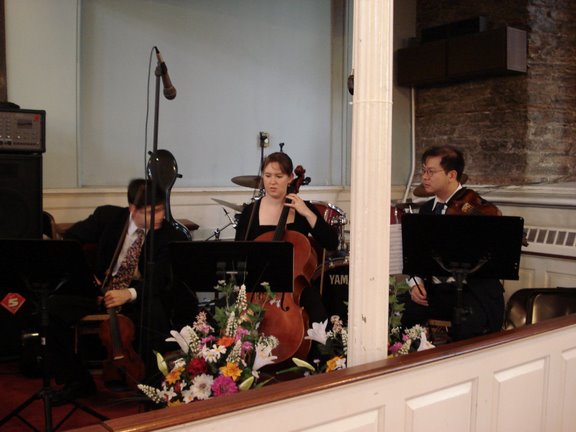
I barely noticed the presence of the string trio since I was so out of it, but for those interested, we asked a friend who books classical musicians do this for us. He said that he works only with top-notch players (both pros and non-pros) and that he could work with any budget b/c it is a buyer's market. At first he suggested a quartet headed by a guy who regularly plays at the Met, all for $1000 for a few hours. But we gave him a budget of only $300 and he eventually came up with 3 ppl that would play for 1.5 hours. He then found the appropriate sheet music for what we wanted (arrangements for strings) and we were set! If only I were a guest at the wedding, so that I could hear all the beautiful music (ranging from Bach's "Jesu, Joy of Man's Desiring" to Vivaldi's "Four Seasons" [the 3rd movement, "Autumn," which fit in with our seasonal theme :P]). From the people that I asked, they said the trio did a good job (or at least they didn't notice any mistakes -- anyone want to add their opinion?).

MUSIC booked by JOHN GINGRICH MANAGEMENT: A
I have no idea how much he charges since he is a friend, but he has mentioned his work with weddings. I just discovered his website online: http://www.gingarts.com/ and I see that he represents vocalists, as well as jazz musicians. If we had a bigger budget, I'd have asked him about music at the banquet and/or cocktail hour as well. *sigh*

And just for fun, here's one of my floral monograms in action:

Tuesday, October 31, 2006

The ceremony details: programs

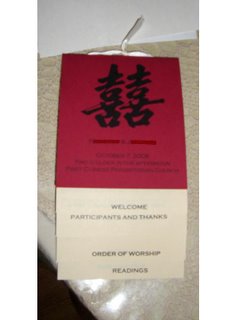
Our ceremony program was a last-minute rush job with SO MANY issues. The first problem was the complicated layout that I thought of -- I wanted it to be longer than it is wide, similar to our invitations, and I somehow figured out how to fit everything on 11x17 paper (with the intention of later cutting it). The layout had sections of upside down text, sideways text, etc. and it was difficult to format it all. To add to it, it was really not ideal to print on 11x17 paper b/c not many printers can print this large size. Someone also planted the idea of a tabbed program in my head 2 weeks prior, even though I told myself it'd be too complicated. I ended up convincing myself that it would only take an extra 2 cuts to make it a tabbed program, which I thought would significantly up the 'wow' factor, but which increased the agita 8-fold.

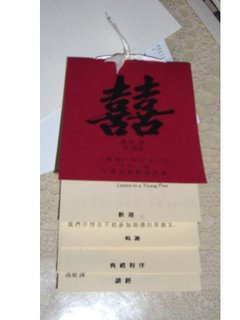
I also wanted a bi-lingual (another complication I should have done without) program where it's English on one side and Chinese when you flip it to the other side (complete with Chinese tabs). It took forever to get the Chinese translation of everything -- I asked at least 3 different ppl for their help and they each had different ideas about stuff (and one person even made mistakes that someone else had to catch). I couldn't ask my parents about this b/c they've never been to a church service, much less a wedding ceremony, other than the tea variety (not that it stopped them from giving input about the wrong word being used on someone else's program). And I didn't want to ask the resident church secretary b/c he's quite annoying and I was under the impression that we'd have to pay him, which I was set against b/c I knew that even though he was invited to the wedding, he wouldn't give a gift (and I was right). I think I got all the wording just 1 week before the wedding -- talk about last minute!

Yet another mistake was desiring ivory-colored paper to not only match the invites but also b/c white isn't a good Chinese wedding color. I ordered the paper from OfficeDepot (only place that seems to carry 11x17 ivory paper -- other places have canary or blue, but no ivory!) and it took forever to get to me (from the incompetent out-sourced ppl who took the order to the slow delivery, it was a nailbiting experience whether I'd get the paper in time).

Aside from the planning, there was also a PRINTING SOAP OPERA! Like with the invites, I had issues printing the Chinese, so I had to lay everything out in Illustrator. However, b/c I am just a novice, I couldn't set the margins to print correctly and my friend offered to set up the layout using tables in Word. So I had to re-input everything into Word (and different Word versions give different results) and eventually print it out at work after-hours. The printer though, did not completely cooperate and I couldn't print all the double-sided pages. So I printed out the 2 separate pages and double-sided it at Dear's workplace, only to discover that we hadn't printed it correctly (some stuff didn't line up so when we went to cut it, things were cut off). So we printed the stuff all over again the next night and brought it to Kinko's to cut the next morning (they charge about $2/cut, though we got differing prices when we called different locations, which we were fine with, rather than cutting each one with a paper cutter at home as we did with the invites) . However, the MORON didn't listen to my instructions and ended up making the cut in the wrong place, cutting all the tabs off! So she re-made the copies using my last original but it not only came out ugly (it had all the lines that I had drawn on it to signify where to cut), but was missing Chinese text (which I didn't know until MIL started folding the programs). Totally frustrated, I decided to make the margins really wide on all the pages so that there wouldn't be a chance of cutting things off. This kinda made things a bit ugly but we finished printing it all out that night and rushed to Kinko's before it closed to explain how the person totally screwed everything up. This time, the guy actually very carefully cut everything up (he even stacked pieces of cardboard on top of the paper so that the blade wouldn't rip the top layers of paper) and things came out OK (nothing cut off, though some things came really close to the edge). He apologized for his dumb and barely educated cohorts who don't have any hopes of advancing in life and wished us well for the wedding. Then I went home and my mother and cousin volunteered to fold all the programs that night. :)

And of course, we ran into more problems when tying the programs together with ribbon. I bought 3 rolls of ivory satin ribbon from AC Moore a while ago, thinking that would be enough. And I have leftovers from the invitations (not satin, but would match) for "just in case." But when assembling everything, I didn't bring the extra ribbon and we ended up cutting up strips of leftover tulle and using that to tie everything together. The tulle gave the programs a different look (kinda airy and fluffy) but it did the job. When in a bind (no pun intended), remember that tulle can be versatile and cheap!

But alas, everything was done by Thursday (albeit less than perfectly) and I could focus on other things for Friday. If I had to do it over again, I would have allotted a full month to the program and I would have either cut out the Chinese part or asked for translations a lot sooner.
An imperfect picture of an imperfect program

When flipped over, the Chinese side

My favorite part of all was the centerfold, which I thought of just 2 days before we were to go to print. At first we were going to put the words of the musical interlude in the middle ("The Water Is Wide," sung by many artists through the years, including Sarah McLachlan, Jewel, & the Indigo Girls at the Lilith Fair in the late 90s) but then we weren't sure whether or not we'd be able to get the sheet music for the trio to play it and upon closer inspection the words had a negative slant to it. Then I read on someone's blog about including a timeline of your relationship and I kept thinking in my head how there were times where our lives intersected but we either didn't see or notice it until much later. I imagined this as 2 ropes intertwining back and forth and to make it more romantic, I decided to draw it as a ribbon. And the cherry on top of it all was when I thought of using the old saying "tie the knot" and illustrating that with the 2 ribbons being tied together and forming one wider ribbon. If I had more time, I would have made the ribbon illustration a lot neater and nicer (like drawing it better in Illustrator and making the heart wider so that the ribbon used to bind all the sheets together would fit within the heart, instead of seemingly cutting it off).
(click on image to enlarge)

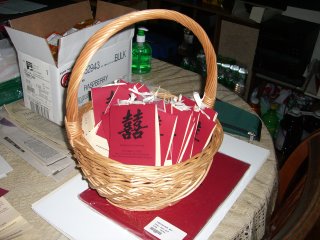
programs in basket (after everything was over but before we cleaned up the dining area from all the DIY)


You can see the wicker basket when full of all the programs (including the tulle-topped ones) in this picture (never mind the somewhat f'ugly tablecloth that we got at the last minute from the 99-cent store -- it's still 10 times better than the naked table by itself):

Another part that I liked about the ceremony/program was one of the readings that I chose, "Passionate Shepherd to His Love" by Christopher Marlowe. I like the theme of love and Christian imagery that it incorporates and I thought it'd be cool to actually use something that I learned in college (English major geek speaking). It was surprisingly a lot easier to find the Chinese translation of this than to translate the other stuff. Besides the help of BM in locating translations on the Web, I factchecked the translation by going to the Donnell Library on 53rd Street, which carries a lot of foreign language books (the biggest collection in the NYPL system). Then I had a reader do this in Mandarin (since I think that dialect sounds nicer, is more formal, and that's what a lot of my side of the family speaks) while the other Chinese readings were in Cantonese (for Dear's side of the family).

Monday, October 23, 2006

How it all came down: the morning before

I started this day bright and early (7:30!) in the Flower District, making decisions about flowers with BM's friend, who helped with the flowers and shall be called floral friend (or FF) from this point on. Yes, I had planned on doing all the flowers by myself but when everyone told me that I was crazy, my BM enlisted the help of her friend who's done flowers for friends' weddings before. So I still had a pretty active, hands-on role with the flowers but I didn't have to do the extra complicated stuff and there was someone there to guide me on what to do -- a good compromise in the thick of wedding craze. Anyway, FF and I had met up two weeks prior at the market to see what's in season and to take note of prices. I told her that my budget was $300 (I purposely undershot this figure, knowing that I'd go over), that I wanted a fall color palette (specifically orange, red, yellow) and that I'd like callas in my bouquet. I also told her about the arrangements that I wanted for the church, which would be moved to the banquet hall later on, the corsages for the mothers, and all the boutonnieres.

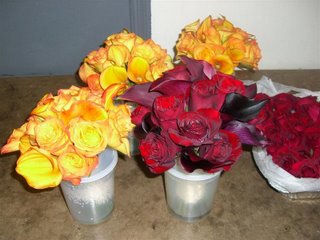
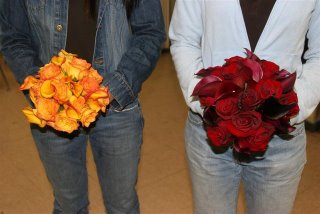
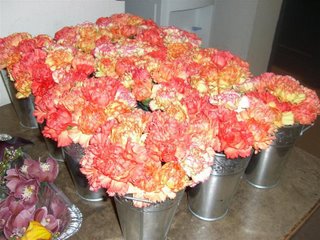
So the Friday before the wedding, we rushed around the various crowded shops to get choice picks (7:30 is right in the middle of the primetime -- towards the end of our stay we were sorta scrambling to get nice stuff). FF had already set aside some flowers she saw (she got there a little earlier) and I approved this bunch of roses from store 1 vs. roses from store 2, etc. In the end, we got 1 bunch of deep red roses & 2 different types of red callas for my bouquet; 2 bunches of yellowish-orange roses and 2 bunches of yellowish-orange callas for the BMs' bouquets; 2 bunches of red roses for relative boutonnieres; several bunches of orange, orange/yellow, yellow/red carnations for the pews; 1 stalk of lavenderish-red orchids for the corsages; 1 bunch tinted euculyptus, 2 bunches wax flowers, 1 bunch lavender, and 1 bunch Japanese hydrangea for the church steps arrangements. All this went over my meager budget but still came in under $500.

At the flower market, once you pick out the flowers, you get a bill from one of the workers who prices everything for you off the top of his head (I think there's some scamming going on there). Then you bring the bill to the counter to pay while some other guys wrap everything up (somewhat neatly) for you. Some places take credit card but some don't and at one of the places we had to pool all our money together to get what we wanted. After buying all these flowers (heavy and bulky, but fit in the car), we headed down to the church where we could start arranging things. We got buckets of warm water to let the roses drink and bloom, and we prepped them by removing thorns, outer petals and leaves. We also started to arrange the carnations for the pew buckets while FF started working on the bouquets. FF also showed us how to make the relative boutonnieres (just a simple red rose) by snipping, taping, and sticking a pin through. With the help of 2 BMs and a friend (Dear also helped prep the roses and cut the floral foam to fit the buckets), we were done by lunchtime. At that point, FF continued working on the bouquets (she had done 2 BM ones already; I think and they were so lovely!) while I went with a BM to the friend's place to do our nails.
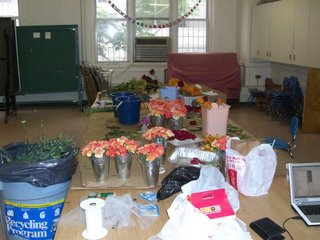
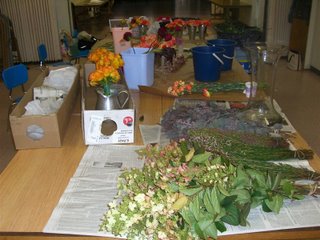
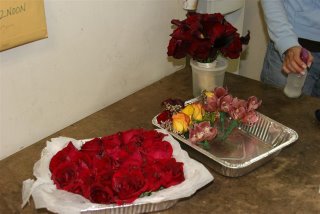
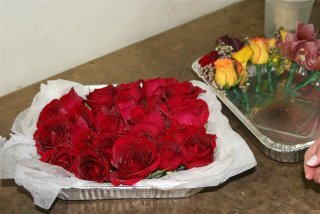
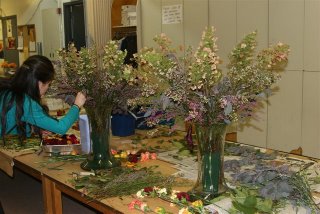
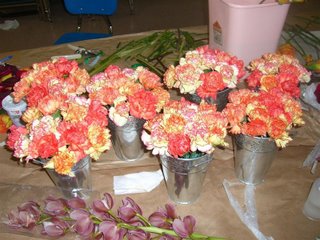
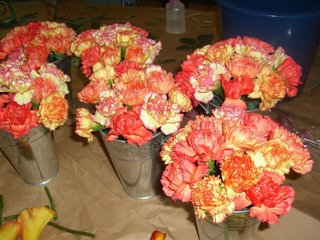
pictures of our work area (I think the flowers are so pretty even before they're arranged)

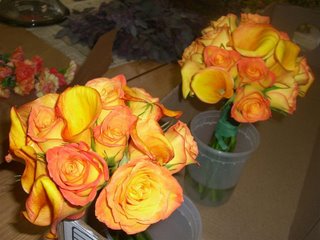
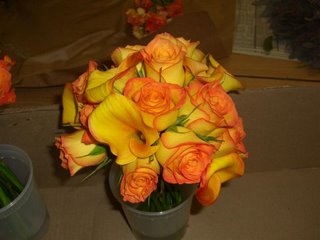
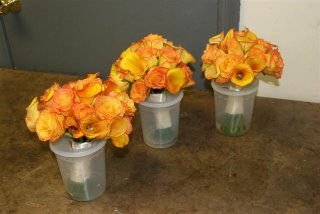
close-up of BM bouquet before the ribbon was tied on and before the roses opened up more

Sometime between this and the rehearsal, BM's sister went and got a bunch of cheap roses for the petal toss at the end of the ceremony and an ad hoc tablecloth for the sign-in table at the church.

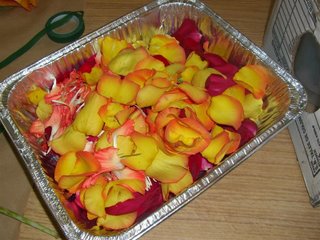
The outer petals we pulled off the roses, plus some of the carnation petals for good measure.

A word of caution/tips for DIYers who would also go to the Flower District to buy flowers -- I think the prices are more flexible than you would think so I think there's room for bargaining, especially since a lot of the places only accept cash when you do not have a business account with them. I, however, was too chicken and bewildered to do so myself. I also sensed some shady business dealings and overall I thought it a shady business that there are no displayed prices, just some guy who quotes prices from his head (as I mentioned above). And FF said 2 different ppl at one store quoted her 2 different prices. Also, you should buy a little more than you think you need b/c some of the flowers were already damaged when we opened them up (we also did some damage as we worked too).

BOUQUETS

The pretty bouquets sitting in plastic takeout containers, ready for safekeeping for the next day (note the notches cut in the covers to keep the bouquets standing straight in the water).

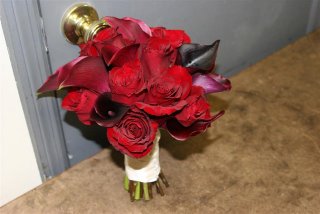
My bouquet, decorated with ivory double-faced ribbon and round pearl-head pins.

With the flash, you notice the different callas: the darker one had a yellow center and the redder one had a dark center

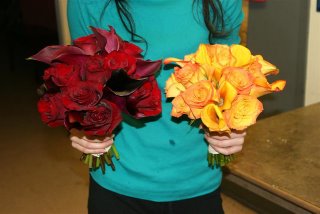
Posing with the bouquets

BOUTONNIERES/CORSAGES

Spraying everything with water to keep it fresh

See how the relative boutonnieres opened up so much -- I think more of the outer petals should have been removed.
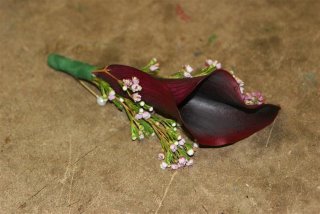
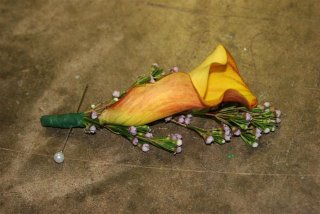
The groom's boutonniere (dark red calla with wax flowers)

I wanted Dear to have double callas but the market didn't have any mini callas so 2 of the regular-sized ones would have been too big.

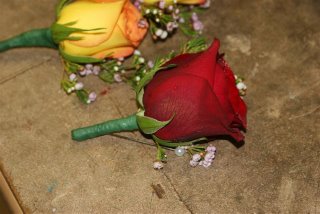
Close-up of my brother's boutonniere (red rose with wax flower) and the GM's bout. (yellow rose with wax flower)

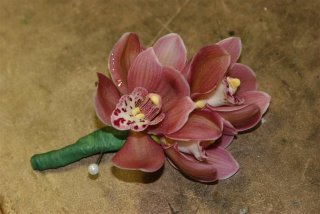
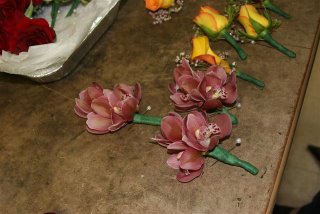
Close-up of mothers' corsages (they are composed of 3 orchids wired together; I think they are phalenopsis)

Originally FF wanted to order cattleya orchids (just one big one) but the price we were quoted was way expensive and I'm kinda glad b/c these turned out well and there were also leftovers to use for my hair in the evening. The one stalk of orchids we used was either $10 or $15 (don't remember).

Fathers' boutonniere (yellow calla with wax flower)

In retrospect, I think the GMs should have had the callas to match the groom and the fathers should have had the roses.

CHURCH STEP CENTERPIECES

FF putting the finishing touches on the Japanese hydrangea arrangements for the church steps (we could have used more flowers for the large vases -- I didn't know how they'd sit in the vase -- but I think FF did a good job of filling them up with what we had).

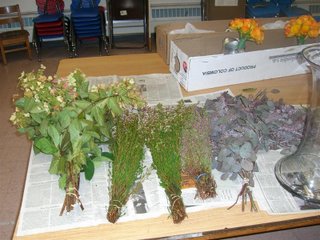
The ingredients for the tall arrangements from left to right: Japanese hydrangea (I wish we got the longer stemmed ones b/c the vases were a lot bigger than we thought but so pretty on their own too!), wax flowers, lavender, tinted eucalyptus.

We got the hourglass-shaped vases from the clearance section in Target for $20 each, which are totally reusable (just have to figure out where). They are huge, about 17" tall I think, with a wide mouth, which made it difficult to fill in with a limited budget. The flowers for this part were less than $100.

PEW FLOWERS

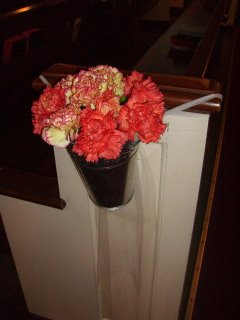
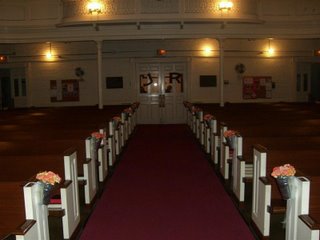
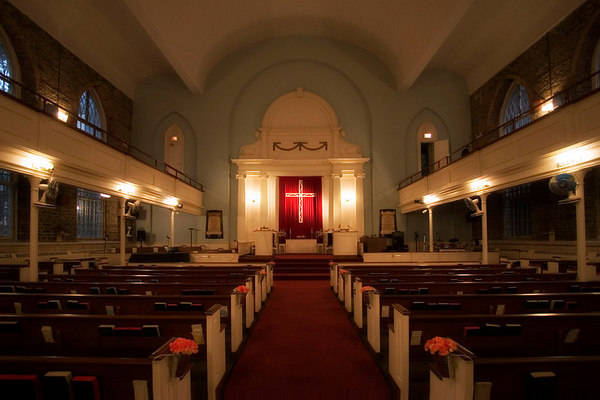
Our rendition of the pew buckets a la Martha but way cheaper, using about 12 stems of carnations for each bucket.

view down the aisle towards the doors (ignore how the floral monogram is crooked on the doors -- we eventually fixed that)

view up the aisle towards the steps (the lights are on only at night b/c during the day the huge windows let in a lot of light)

With a bunch of 25 carnations for $7.50, this was a lot more economical than using hydrangeas. I think they were just as lush-looking and maybe even nicer than Martha's, since they were such bright colors and fit in with my color scheme. The buckets were purchased from Wal-Mart for about $1.50 each (we bought 12), 2 packs of floral foam were about $6 (I think), and we hung each with tulle (part of a 1000' roll that we used for the favors as well -- purchased from AC Moore using a 50% off coupon for a total of $5, I think).

Before FF got her hands on the pew arrangements, our creations looked a bit ragged and sparse:

Then she worked her magic and they came out much neater and so happy-looking:

Once the buckets were hung on the pews, we added some water into the buckets. The cube of floral foam stuffed into the bottom to hold the flowers in place also helped to keep the flowers hydrated.

FLOWERS GRADE: A
OK, so I worked on the flowers a little too, so it's like grading myself here but I have to say FF did a phenomenal job. She doesn't do flowers professionally but I did pay her a little something and I have to give credit where it's due -- she went above and beyond what I expected (she said she'd work on the bouquets only and just show us how to do the other stuff but she ended up also putting the finishing touches on the stuff we worked on, plus the church step arrangements which turned out to be quite a challenge). She was very organized and did a good job with the limited budget I gave her (I changed relative boutonnieres to roses instead of carnations at the last minute so I'm sure we would have stuck to the budget even closer if I hadn't made that change). She also thought of solutions I wouldn't have, including coming up with a variety of flowers for my hair for my second dress (the flower we saw at our first meeting weren't available on the actual day we needed them). I also thought the bouquets came out beautiful (though I'm surprised they didn't come out as nice in pictures), the groom's, fathers, and GM boutonnieres were nice too, as well as the mothers' corsages. When I saw all the completed flowers, my stress level definitely declined a few notches at their gorgeousness. I'm not sure if FF would be interested in future work but if anyone is interested, I could definitely forward her your info.

Final thoughts: One thing I didn't think of until I saw pictures is that I should have used a different flower for Dear's bout. b/c the dark red calla was barely visible against the black tux in pictures. Perhaps there should have been some small lighter-colored accent flowers or foliage behind the calla....

Friday, October 13, 2006

BM goodies

It took me a while to decide what to give my BMs and I ended up assembling a bunch of orange items (some handmade, some not) and other stuff together that I hope they enjoyed receiving. I intended on giving out the packages at the rehearsal dinner but it was so noisy and crowded there (plus I was so tired and in such a pissy mood) that I ended up giving it to them at the hotel the night before. We were all busy working on last minute stuff (one BM was re-doing my nails and also helping my mother do hers while another one was doing last minute ironing) that I didn't get to see their reactions but at least they used some of the stuff on the day of....

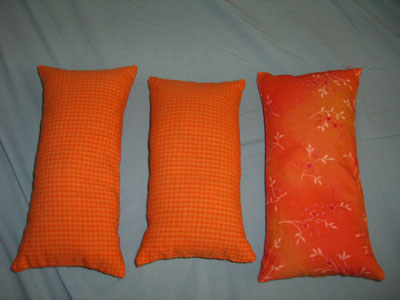
LAVENDER EYE PILLOWS (made in orange to fit in with the color scheme): I started by making the middle one and realized it was a tad too short (but still functional) so I made the other ones longer. After all was said and done, I realized I also overstuffed these babies... oh well.

taken with flash


taken w/o flash


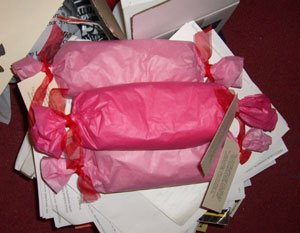
all wrapped up with some tissue paper, tied with leftover sheer red ribbon and a tag with use instructions, including putting in the freezer or microwave for cool/warm experience

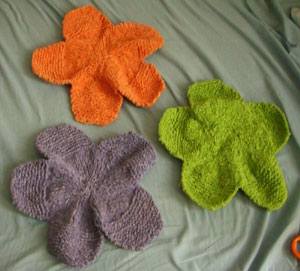
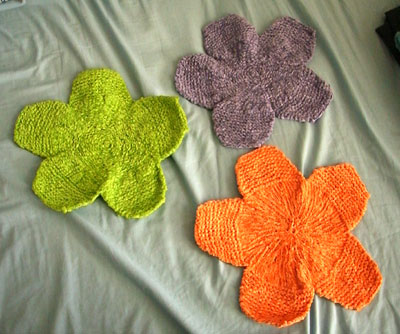
FLORAL FACE CLOTH: knit up a long, long time ago (before I came up with a color theme, otherwise I'd have made all of them orange)

taken w/o flash

the washcloths after blocking (you'll notice these look more finished & flatter)


washcloths all wrapped up with a tag to explain use and care (excuse the weird background -- I had to hide the mess of my desk)

Aside from these items, I also included a pair of giant pearl earrings with a sterling silver setting, an orange scarf/shawl, a pair of Old Navy flip flops in maroon, and a bottle of papaya body lotion from Missha (in orange bottle).

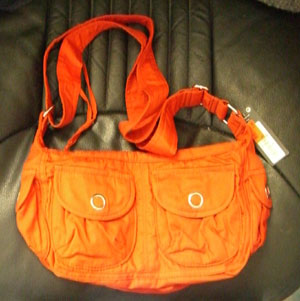
I put all the things in an orange bag I found at H&M. It has lots of pockets which came in handy for holding all the various items. I then put the filled bags in a red paper gift bag and put the scarf on top since it was fairly hard to wrap everything.

Thanks for all your help (and patience in dealing with my Bridezilla moments) ladies!